
 This downhaul system gives you 12:1 purchase with no detectable friction and no need for any internal stuff (and no mast leaks). It makes it easy to get enough downhaul on a Mozzie mainsail.
The geometry involved in setting this up was initially ‘challenging’ but now here are all the details so you should be able to set it up relatively quickly. Test it out before cutting the ends and finishing off your Dyneema splices so you can fine-tune the lengths to suit your sail and mast.
I’m assuming your mainsail has an eyelet to attach a shackle to the downhaul. If you have some other arrangement I’ll leave it to you to figure out how to attach a “single pully with becket”.
Click on the images to get a closer look at any of them.
Required parts
- 2x 20mm Cheek blocks – RF20151A or similar
- 3x 20mm Standard single blocks – RF20101 or similar
- 1x 20mm Single block with becket and a shackle just big enough to fit the downhaul eye on your mainsail – RF20111 or similar
- 2x Deck eye or hooks (depending on your setup see below)
- 2x RF5 Swivel cleat/pulley on the mast
- 2200mm of 3mm Dyneema
- 1200mm of 5mm Dyneema
Step 1
You need a single cheek block attached to the front of the mast 1600mm from the base.

Step 2
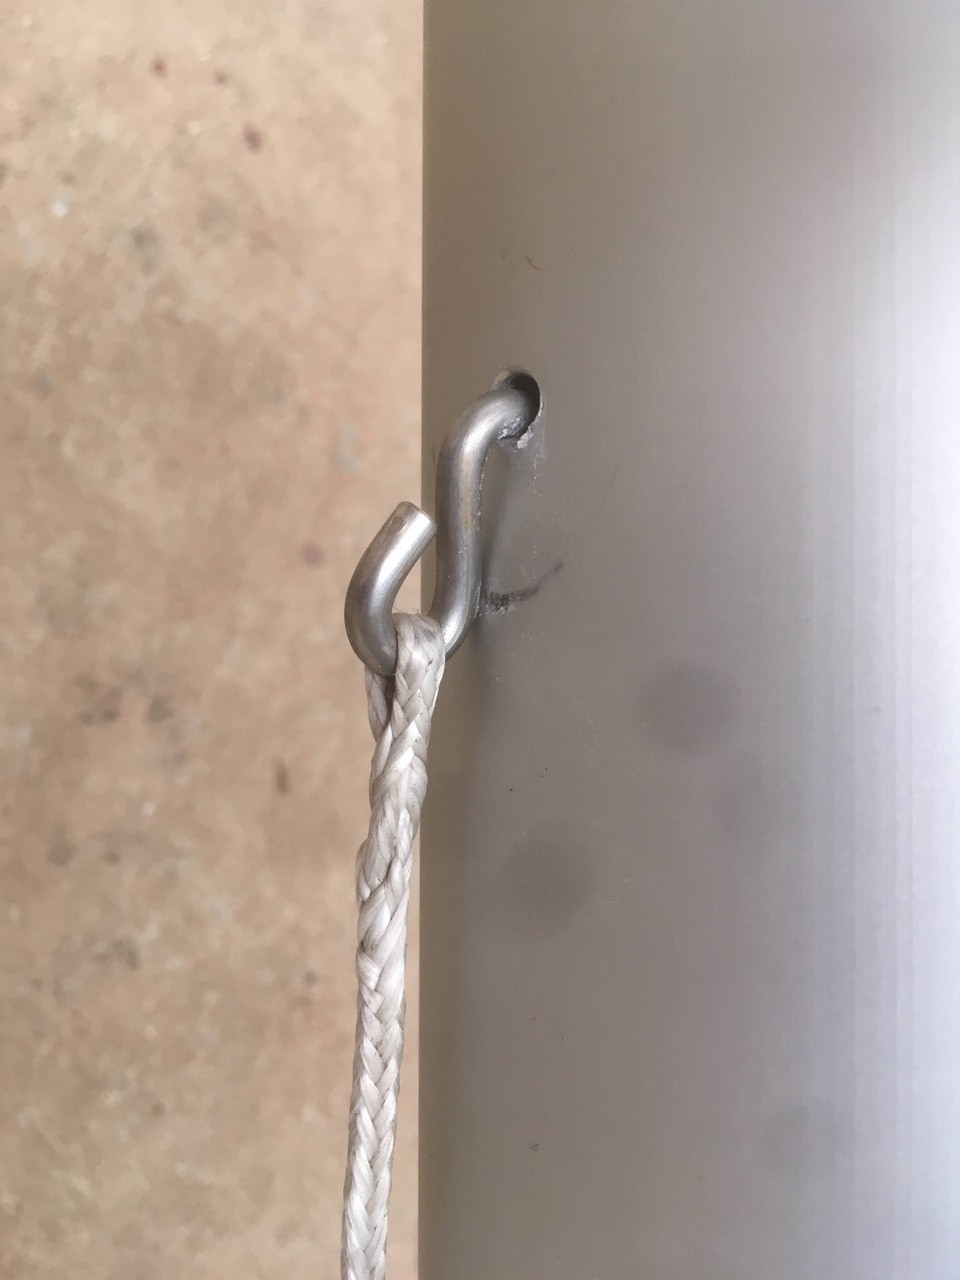
You need a way to tie off the 3mm Dyneema at 1150mm from the base of the mast, so attach a small stainless deck eye or (as in the photo) drill a hole in the mast track and use a hook. Or any other way you can think of. The attachment needs to be at the back of the mast on the starboard side of the mast track. Attaching to the track avoids making a hole (and possible leak) in the mast.
Step 3
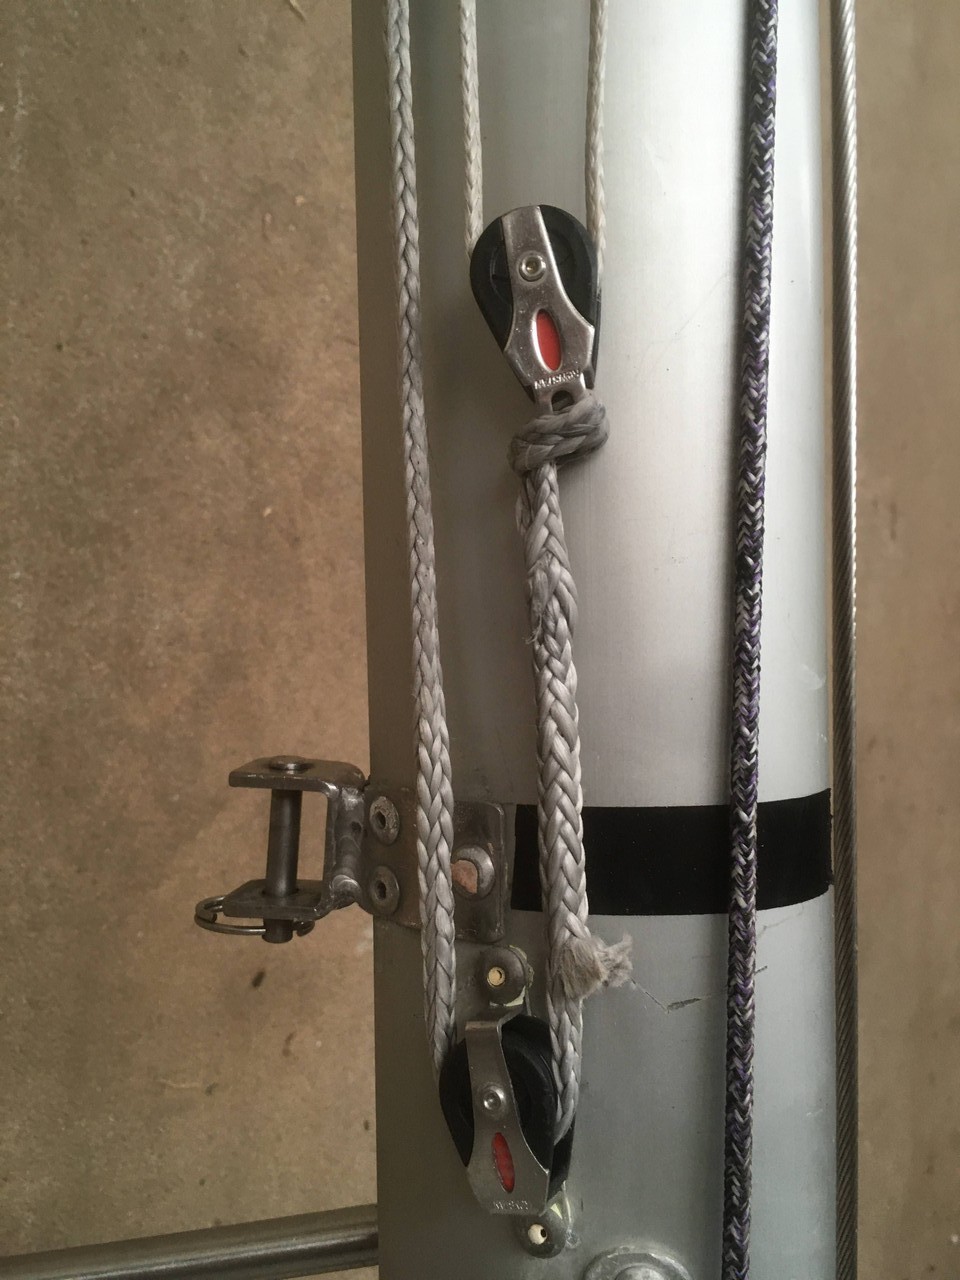
Fix a single cheek block just below the black band on the starboard side of the mast as in the photo.
Step 4
Make up a length of 5mm Dyneema with a loop on one end (big enough for a pulley to pass through) and the becket of the single/becket block at the other end. To splice both ends, the free end has to be done first and then the other end can be spliced on to the becket. Overall it should be close to 1050mm in length.

Run the free end through a loose single pulley (I will call this pulley ‘A’), then back through the single/becket block then down to the cheek block below the black band then up to a loose single pulley which I will call pulley ‘B’. Which can be “looped” on like this –>>
Step 5
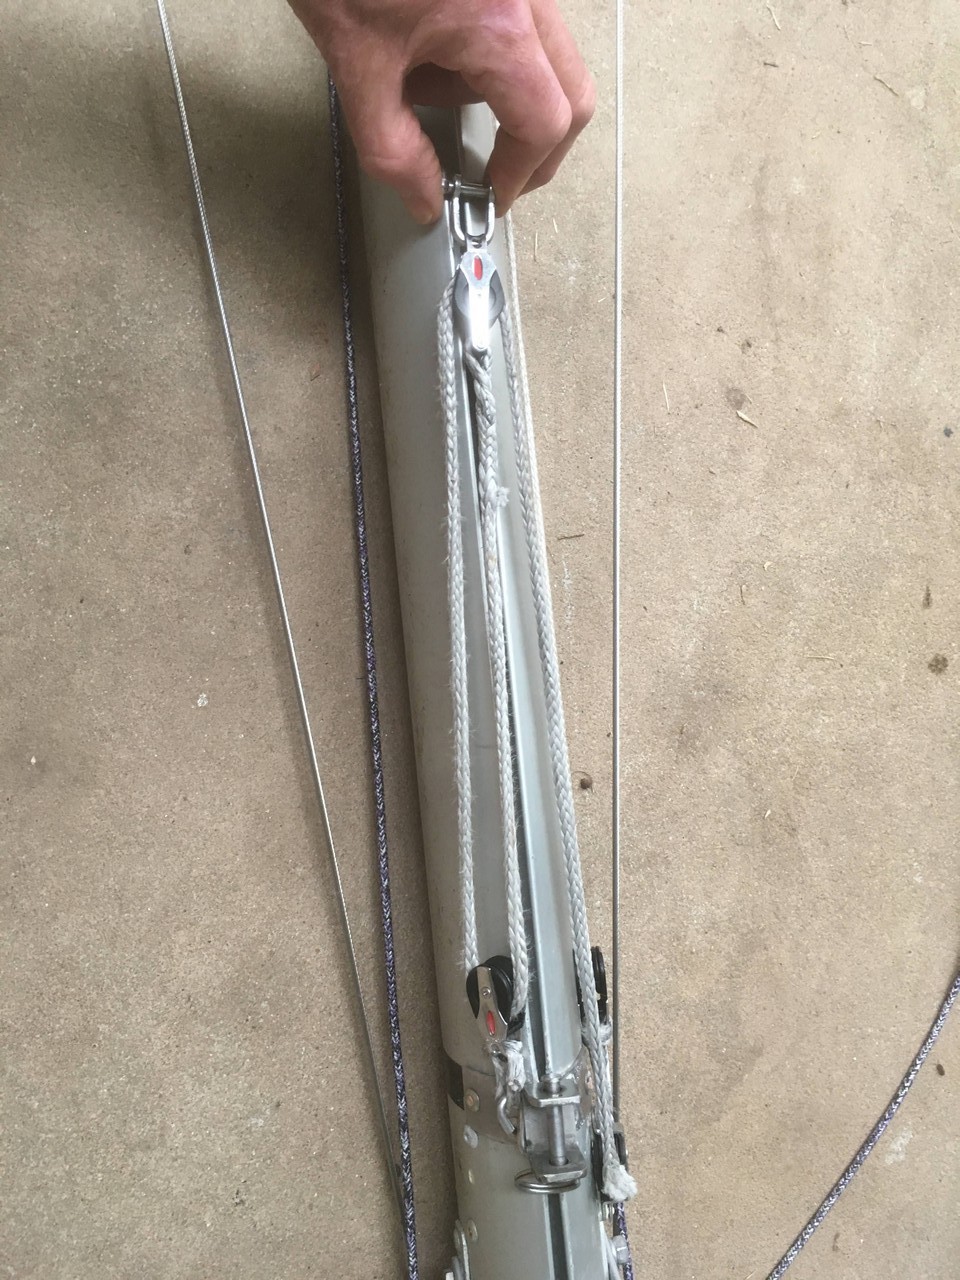
Make up a length of 3mm Dyneema with a loop on each end, close to 2000mm in length. On one end attach it to the deck eye (or hook) on the side of the mast, run it through pulley ‘B’, then throughthe high cheek block (1600mm from the base of the mast) and attach it to another single pulley (“looped” on as above). Now the downhaul control line can be fed through this last pulley and to the cleats at the mast base.

Step 6
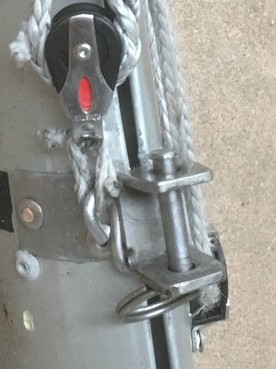
Now back to pulley ‘A’, the one hanging down from the becket pulley. This pulley needs a hook attached which (while sailing) will be hooked on to the mast at about the height of the gooseneck fitting, on the opposite side to the cheek block.
In the photo an AHPC gooseneck fitting is being used which has a convenient space to put the hook. If you don’t have this kind of fitting then another deck eye will do the job.
In use
Shackle the pulley/becket on to the mainsail when the sail is up and attach the hook to get the initial luff tension when launching.
When you come ashore you can simply “unhook” to release all luff tension to make the boat easier to handle.