
Equipment needed
| Item | Description | Approximate Cost |
|---|---|---|
| The Spinnaker | Available from any sailmaker, though Lindsay Irwin, Alegayter and Greg Goodall already have Mosquito spinnaker designs on their computers ready to go. | $900 |
| Pole | The top of an old aluminium windsurfer mast is ideal. SailboardHQ in Melbourne sometimes have second-hand aluminium and carbon masts. A broken one from a windsurfing friend would be the cheapest option, and a carbon one looks nice but is not essential. Otherwise aluminium tube about 35mm diameter and 3 metres long would be sufficient. | $15 |
| Halyard | 20 metres long, 4mm. Find a rope type that twists without kinking. | $105 (total of all ropes combined) |
| Tack line | 3mm or 4mm spectra | |
| Sheet | 9 metres long, 6mm (or thinner if you have good sailing gloves!). Must be smooth so it runs over the forestay easily. | |
| Pulleys | Friction is the enemy of spinnaker hoists and drops, so use good quality ball-bearing blocks everywhere. The halyard pulley attached back-to-back to the tack line, must be a high-load type otherwise it will wear out after only a few races. If you can afford it use HL blocks everywhere! | |
| Pulleys – x6 | $150 | |
| RF20281 – x1 – Back-to-back pulleys | $37 | |
| RF46101 – x2 – Ratchet block | $152 | |
| Deck-eyes | Six small ones | $15 |
| Halyard cleat | This takes a beating. A lot of halyard gets dragged through it at speed every time the spinnaker goes up, so make it a good quality one! | $35 |
| Chute moulding | Matt Stone can supply chute mouldings. They are similar in style to the one in the photos below. | $75 |
| Spinnaker sock | Made out of dacron, mylar or fine netting and available from any sailmaker. The sock must be a good fit on the chute moulding. | $85 |
| Total approximate cost | $1580 | |
Rigging the pole
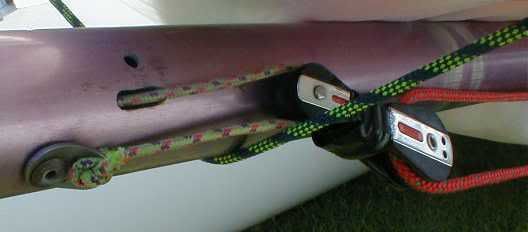
1. Attach a small ball-bearing block (or sheave) as close as possible to the end. The pulley should be a maximum of 3 metres from the main beam.
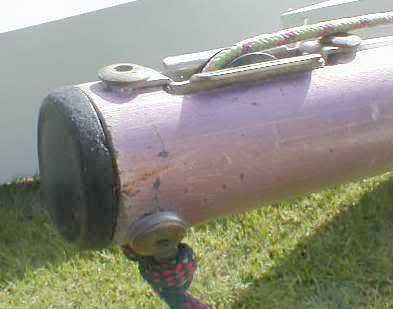
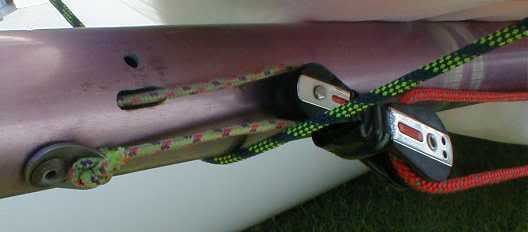
2. The tack line should be tied off to an eye on the side of the pole close to the chute mouth (photo below). From there it goes back through a loose ball-bearing block (with another block connected to it back-to-back), then forward to the pulley on the end of the pole then finally back again to the tack of the spinnaker. The poles in the photos have the tack line run inside, which is neat but not essential. If your tack line is as thin as the one on the left you may need to put a plastic ball on the line to stop the knot jamming in the pulley.
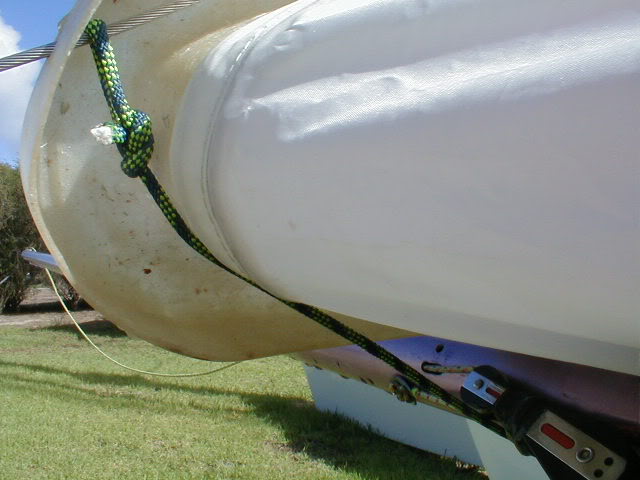
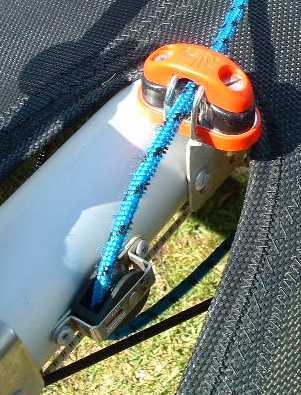
3. The pole is attached to the main beam just below the mast foot. A fairly simple fitting is shown here, which is all that’s needed. A pin is passed through this bracket and the pole to hold it in place. Nearly all the load here is back into the main beam, so this attachment does not need to be super strong.
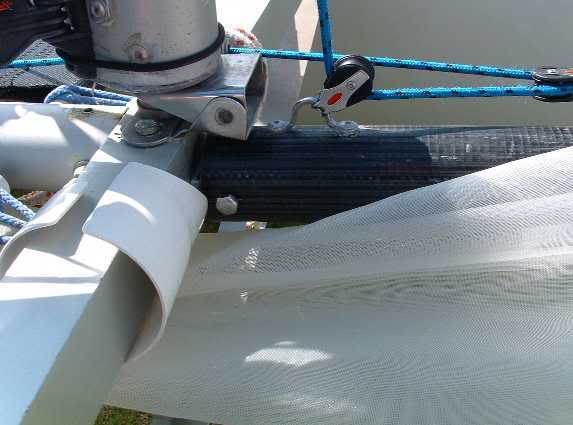
If you have a hinge for putting up the mast then you can use the same pin to attach the pole. This photo also shows how a piece of PVC pipe can be used to give the spinnaker a smoother ride past the main beam when it comes down.
Pole stays
1. Two running from the end of the pole to the bow tips. I originally tried using the chain plates, but I have learned that rigging the stays to the bow tips makes the pole a lot more stable and it has the big advantage of also filling the gaps between the end of the pole and the bows, so the spinnaker and sheets are kept from dropping under the bows.
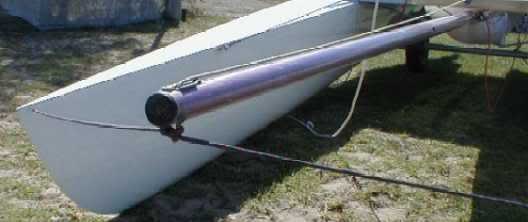
2. Tap around for the solid part of the bow tip and drill a hole just big enough for the rope. I used a washer on the outside to spread the load, though I don’t think this is really necessary. Alternatively you could bolt or screw a small stainless plate to the outside of the bow which folds inwards over the top.
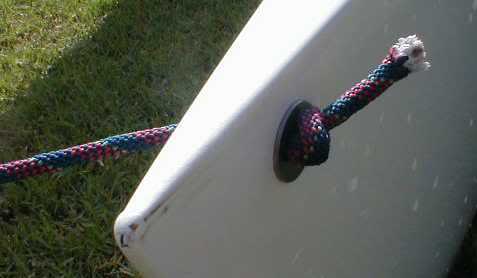
3. I’m using 4mm Dyneema for the stays which doesn’t seem to stretch much at all. Lighter would probably be ok. If you can lift the bows of the boat with the pole then it should be strong enough. Note that the stays do not need to be under tension. The spinnaker takes the slack out as soon as it fills.
4. While the spinnaker is stowed the pole is supported by a short piece of string from the main bridle. When the spinnaker is flying the pole only needs to be held down!
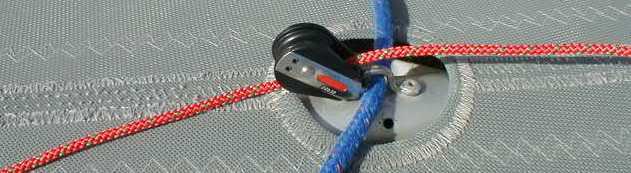
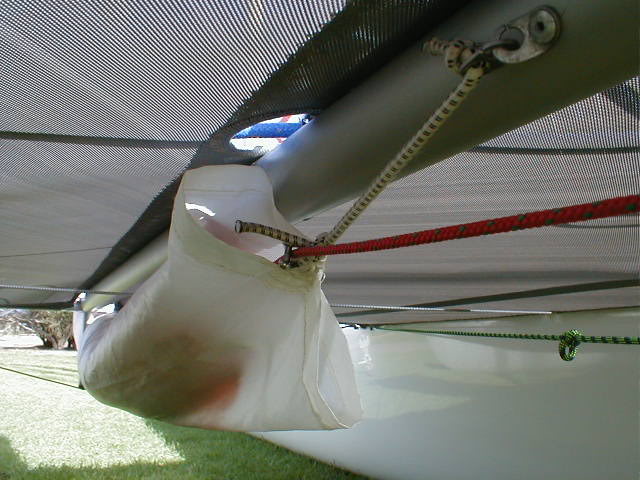
Chute mouth
The most common chute seen on Mosquitoes is the triangular chute mounted on the bridle. These are available from Matt Stone. The ring mounted on the pole is another option and AHPC can supply these as used on Vipers and Taipans.
1. A sloop bridle is ideal for a triangular chute. The bridle wires pass through the moulding at each side and the forstay attachment passes through the top of the moulding. These hold it in place.
2. If the bridle chainplates on your boat mean you can only use a high “cat-rig style” bridle, it will be necessary to use some thin spectra to set up a “fake” bridle for a triangular chute to mount on. These lines would be tied off at the bridle chainplates and up to the forestay. A circular chute is an option in this case.
Sock
1. It’s important to firmly attach this to the chute moulding, as it is pulled towards the back of the boat quite strongly when the spinnaker is being pulled down. Glue and/or pop rivets can be used and some chutes also have a beading around the moulding.
2. A mylar chute is good because it keeps any spray off the spinnaker and doesn’t cause much friction. Unlike dinghies, a cat is very unlikely to ever put the chute mouth into the drink (until it is past the point of no return!), so the chute does not need to be able to drain in a hurry. In practice any material that does not stretch will do.
Halyard
The following sequence of photos follows the halyard from the head of the spinnaker along it’s tortuous path to the patches in the centre of the spinnaker.
1. From the head of the spinnaker the halyard runs straight up the mast to the pulley, which is a maximum of 6380mm above the top of the main beam. The pulley hangs on a line from the top of the mast. It is held in place by a loop running around the mast. This loop is tied off at the mast track, either inside or outside the track. This allows the mast to rotate when the spinnaker is up.
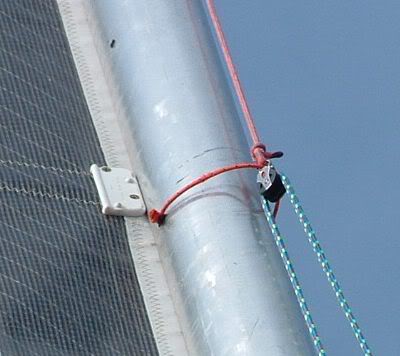
As the halyard runs down the front of the mast it’s a good idea for it to pass through an eye on the front of the mast at the diamond spreaders. This will prevent the halyard wrapping around behind the spreaders.
Some boats are also rigged with an eye at the hounds to hold the halyard in front of the stays and trapeze wires. This is optional, as the boats without this don’t seem to have any problems.
2. At the base of the mast the halyard runs FORWARD through a pulley mounted either on the spinnaker pole or on the front of the mast or the beam.
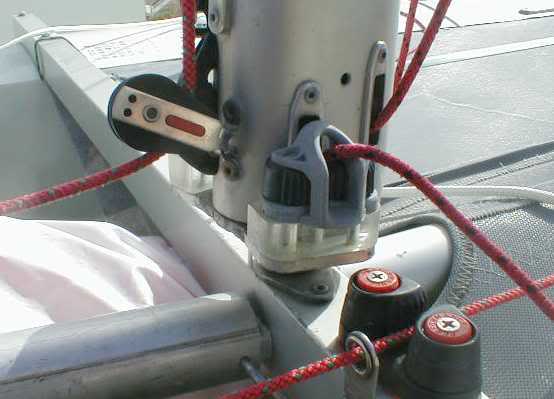
3. Next the halyard runs through the back-to-back pulleys which are attached to the tack line, and heads back to the main beam.
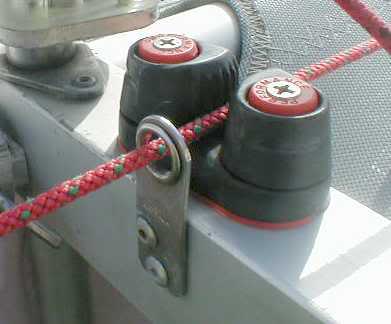
4. At the main beam the halyard runs through a guide which leads it into a cam cleat. This cleat is mounted on the main beam, but some boats have it mounted further back on the centre beam. It’s just a matter of personal preference.
5. The halyard continues to the back of the trampoline via a pulley maybe a metre from the rear beam (further forward if you want a crew to operate the halyard).
6. At the rear beam the halyard goes round a pulley (or pulleys in this case) and heads forward again under the tramp.
Depending on your particular setup, you may find the retrieval line drops into the water when the spinnaker is stowed. To prevent this some people use a cleat at the rear of the tramp (as above).
7. In this photo the halyard passes through a small shackle on the end of the chute (to stop the spinnaker being pulled out of the rear end of the chute, where it would jam) and is then tied to the spinnaker. A better option is to make the tack line only just long enough for the spinnaker to go into the chute then this stopper on the end of the sock is not necessary.
The halyard tail passes through the two lower patches and is then tied to the 3rd (highest) patch. Make sure the knot cannot pull through the 2nd patch and jam there when the spinnaker comes down. If so you need to add a ball (or a bigger knot) to make sure that can’t happen.
Spinnaker
Any sailmaker can make you a spinnaker though Lindsay Irwin has certainly made the bulk of Mosquito spinnakers over the years.
Contact numbers:
- Linsay Irwin – 03 9555 7328
- Alegayter Sails – 08 8241 0880
Sheets
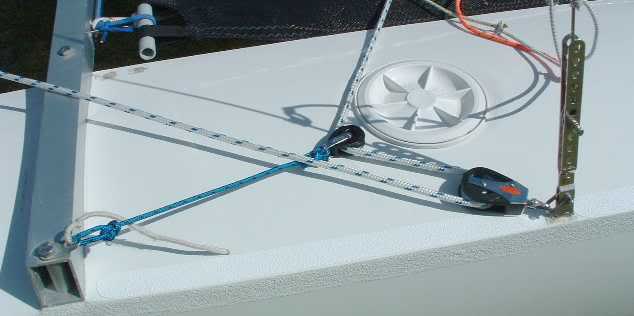
There used to be a comment here about there not being much load on the sheet. Practise has shown that in fact the sheet load does get quite heavy so rather than being optional, ratchet blocks are actually quite essential to keep everything under control. Also to enable easy gybing it is important to use the automatic type that only engages the ratchet when it is under load. Currently the Ronstan Smartratchet seems to be the only choice, although there is a rumour that Holt-Allen make a similar product.
An important point to notice in the photo above is that an extra turning block is attached to the main beam for the spinnaker sheet. As can be seen from the photo, this wraps the sheet right around the ratchet block which makes an enormous difference to the effectiveness of the ratchet. With this kind of setup the sheet becomes quite easy to handle. You may see comments in F16 circles about using two smart-ratchets on each side to handle the load more easily, but in the case of the Mozzie you should save your money and just buy two ratchets to start with. You should find this is enough, but if the crew (or forward hand in the case of cat sailors) is complaining you can always take out a loan and buy another two later.
The sheet can be continuous and attached at each end to the spinnaker clew or you can have two separate sheets with the tails led to the opposite rear corner of the tramp (crossing over). For crossed over sheets they only need to reach within about 800mm from the corner with the spinnaker down. A piece of light elastic should be tied between the sheets and run across the rear beam to keep the sheets in place.
6mm sheets are sufficient for most people, but thinner would be ok (and especially good in a drifter). It helps to use smooth braided sheets so that they slide over the forestay easily through the gybes.